SUPPORT > WS-FTP Tutorial:
Step 1 - Create a session profile.
Do this by clicking on the "CONNECT" button
found on the menu bar at the bottom-left of the WS-FTP program.
A window similar to the picture below will appear.
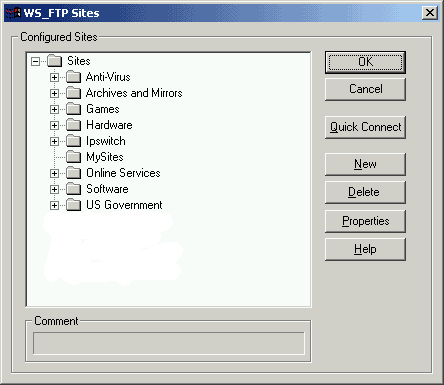
Figure-1 (Configuration)
Step 2 - Click on the "NEW" button,
on the right side of the screen.
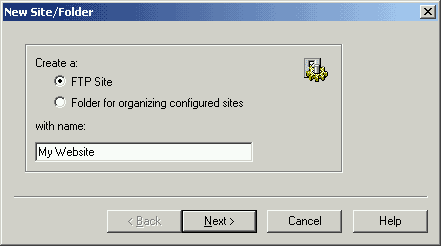
Step 3 - In the "New Site/Folder"
window, type in the name you wish to call the desired connection.
This can be anything you want.
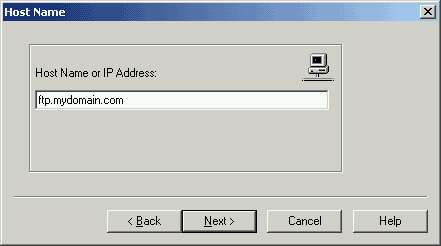
Step 4 - Type in the FTP address of the FTP site you
wish to connect to.
This address goes into the "Host
Name or IP Address:" address box. It will be
something like ftp.your_domain.comor the permanent adress for your
site: ftp.your_domain.com.phtemp.com
click next.
Step 5- Type your FTP username in the "USER
ID" box, it will be something like a0018029.
Step 6- Type in your FTP password in the "Password"
box.
Click Next.
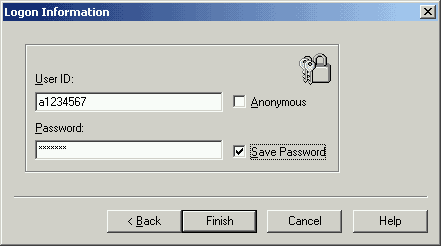
Step 7- To save the configuration,
put a check
in the "Save Password" box. Then click
on the Finish button. This will save your configuration.
Step 8- To connect to the site you just created, click on the "OK"
button .
3.
How to transfer files
Some things to know:
After connecting to your web site, a window similar to
this will appear.
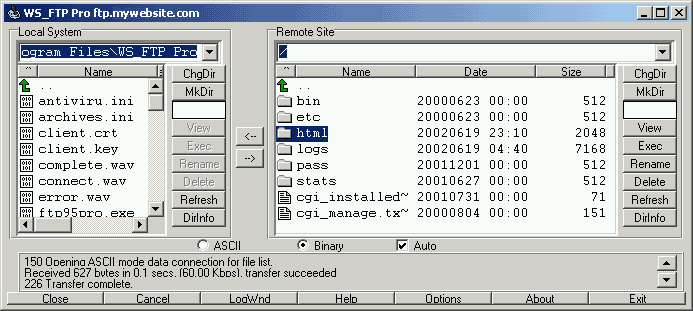
Figure-2 (Basics)
Notice that the FTP window is split into two sections in
the figure above. When you connect to a site, your computer
will be on the left side, under section "Local System"
and the remote computer will be on the right, under "Remote
System". Local System will display the current
path, files and drives on your computer. Remote System
will display the current path, files and drives on the remote
computer you are connected to.
Directly under the label "Local System" you
will find a file listing. The top box will contain your
current path (in the above figure, this would be "C:\My
Web") And the bottom box will contain a listing
of the files in the current directory. The Remote System
will contain the same type boxes, only displaying the remote
computer's information.
Uploading and Downloading Files
To upload files to your Web site:
Step 1 - Put a checkmark in the box that says "auto".
It is located near the bottom.
Step 2 - Highlight the files you would like to transfer
to your website by choosing them from the left box.
Step 3 - Push the button that looks like an arrow
pointing to the right which is located between the two columns.
Step 4 - Another box will come up telling you the
status of the transfer.
Step 5 - When that finishes you will be done transferring
the file and you should be able to see it in the right side
now.
To download a file from your website:
Step 1 - Put a checkmark in the box that says "auto".
It is located near the bottom.
Step 2 - Highlight the files from the right side you
would like to download to your computer.
Step 3 - Click on the button that points to the left.
Step 4 - A box will appear and the files will begin
transferring. Once they finish you should see them listed
on the left side.
|
ProHosting has hosted over [an error occurred while processing this directive] web sites since 1996!
|
|
